

Every position in this family keeps the partners facing each other, which means the feedback channel — the face — stays open the whole time. Most of them start from the same setup: the receiving partner on their back, the other partner above or kneeling between their legs. What separates the nineteen entries is almost entirely what the receiving partner's legs are doing. Flat, wrapped, one raised, both raised, folded back toward the chest — each notch tilts the pelvis further, steepens the angle, deepens the entry, and raises the flexibility asked of the receiving partner.
The second variable is hip height. The receiving partner's hips can stay on the floor, lift onto the kneeling partner's lap, or move up to a table or bed edge for the standing entries. The lap-supported positions are easier than their diagrams suggest, because the lift is rested rather than held; the furniture positions depend on a sturdy surface at close to the right height, which is a real constraint rather than a footnote.
The list runs easiest to hardest. The first few ask little more than missionary does; the middle tier starts raising legs and hips; the last few are flexibility positions best approached in order rather than sampled cold. Missionary itself opens the list but gets only a short note — it's the reference point here, and the variants are the reason this page exists. When a deeper entry isn't working, the fix is usually one step back up the list, not more effort.
The positions
Missionary
The baseline the rest of this list adjusts from, and the one to start with if any of this is new. The receiving partner's legs are the adjustable part — flat, bent, wrapped, or raised — and every entry below is one of those settings taken further. We'll keep it short here and give the variants the room. Full entry in the glossary.
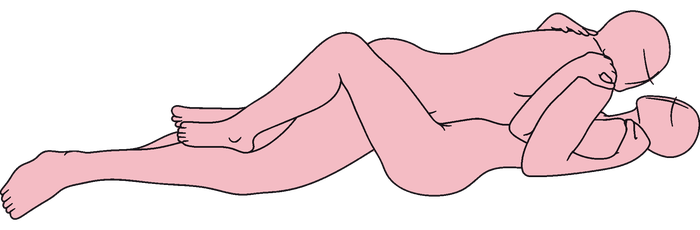
Face to face, one partner on top — the most common default, and more variable than it looks.
Wrapped Missionary
The first notch on the dial: the receiving partner's legs wrap around the other partner's waist, and it costs nothing extra to get there. The wrap tilts the pelvis up slightly and gives the receiving partner a way to pull the other partner closer or slow the pace with their legs. If plain missionary feels flat, try this before anything more ambitious. Full entry in the glossary.
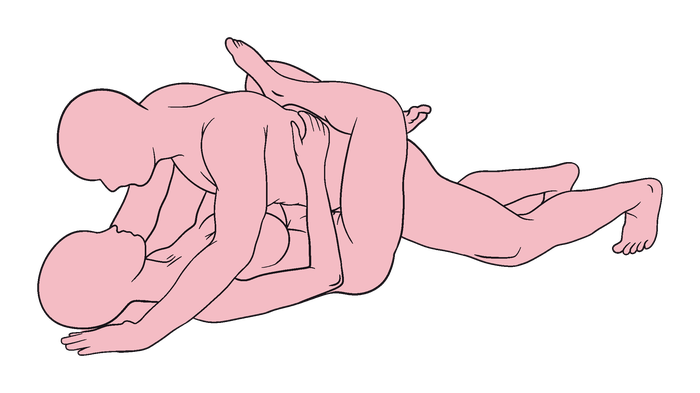
Missionary with the receiving partner's legs wrapped high around the top partner's waist and lower back.
Twisted Missionary
The first entry that changes the angle without asking for any flexibility: the top partner rotates onto the diagonal so the two bodies cross at the hips. The novelty is entirely in the new angle, and the only real work is keeping the diagonal steady. A good pick for couples who want variety but aren't interested in leg-raising. Full entry in the glossary.
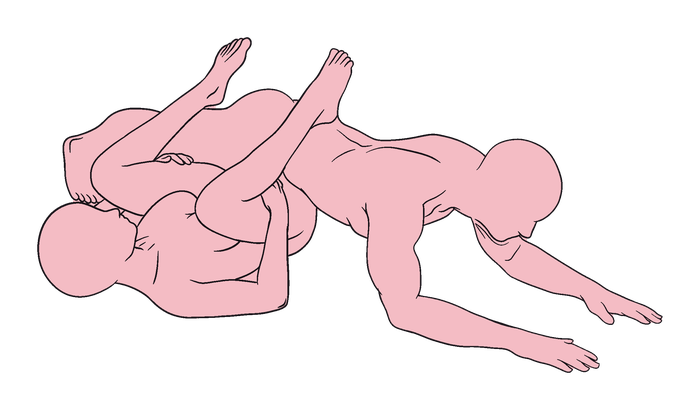
Missionary rotated onto the diagonal so the two bodies cross in an X at the hips.
Single Leg On Shoulder
The gentlest introduction to the leg-raise half of this family — one leg goes up beside the kneeling partner's shoulder while the other stays planted on the floor. The grounded leg keeps the receiving partner stable and the hamstring demand modest, which is why it belongs ahead of the two-leg versions. If the raised leg complains, it lowers without dismantling anything. Full entry in the glossary.
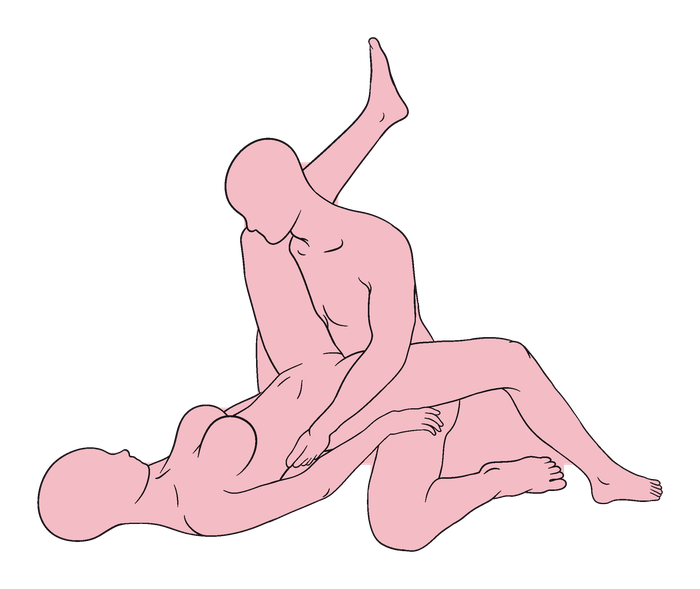
One leg straight up beside the kneeling partner's shoulder, the other bent to the side, foot on the floor.
Legs on Shoulder
Both legs up together against the kneeling partner's chest — the two-leg version of the previous entry, with roughly double the hamstring bill. A soft bend at the knees is the built-in escape valve, so nobody should be gutting out straight legs. Steeper and noticeably deeper, and worth reaching only after the single-leg version feels easy. Full entry in the glossary.
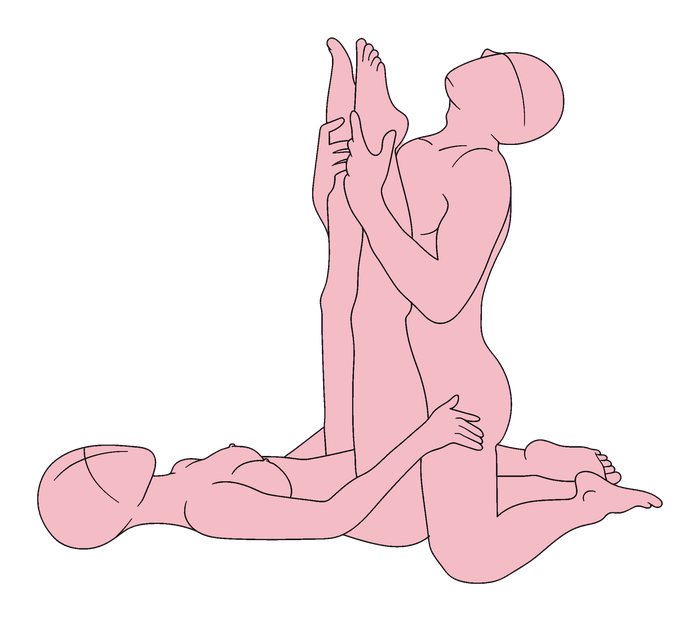
Legs raised straight and held together against the kneeling partner's chest and shoulder.
Guard
The first of the lap-supported positions: the receiving partner's hips rest on the kneeling partner's lap with legs wrapped around their torso. Because the lift is rested rather than held, it's far more sustainable than the diagram suggests. This is the shape the harder guard and butterfly variants below are built on, so it's worth settling into properly. Full entry in the glossary.
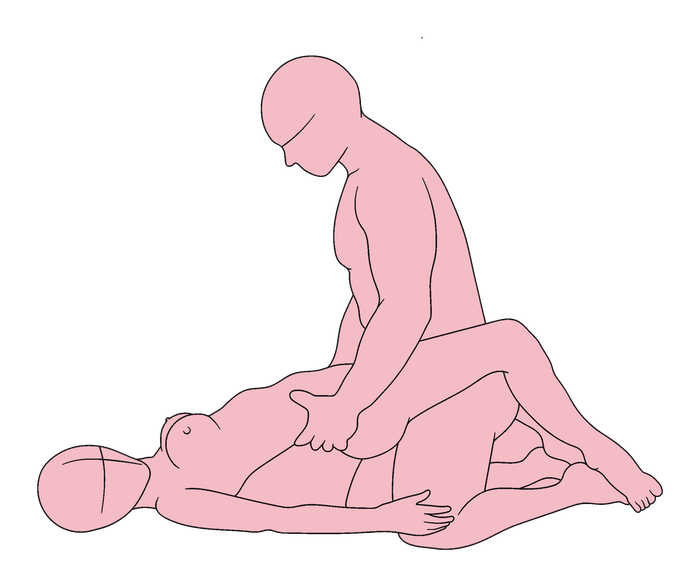
The receiving partner's hips rest on the kneeling partner's lap, legs wrapped around their torso, shoulders on the floor.
Lazy Butterfly
Guard's arched sibling — hips still on the kneeling partner's lap, but the back arches and the head drops low, with a firm handhold keeping everything steady. The handhold isn't decoration; it's the support that makes the arch sustainable. A reasonable first taste of the arched positions before anything in the tier below. Full entry in the glossary.
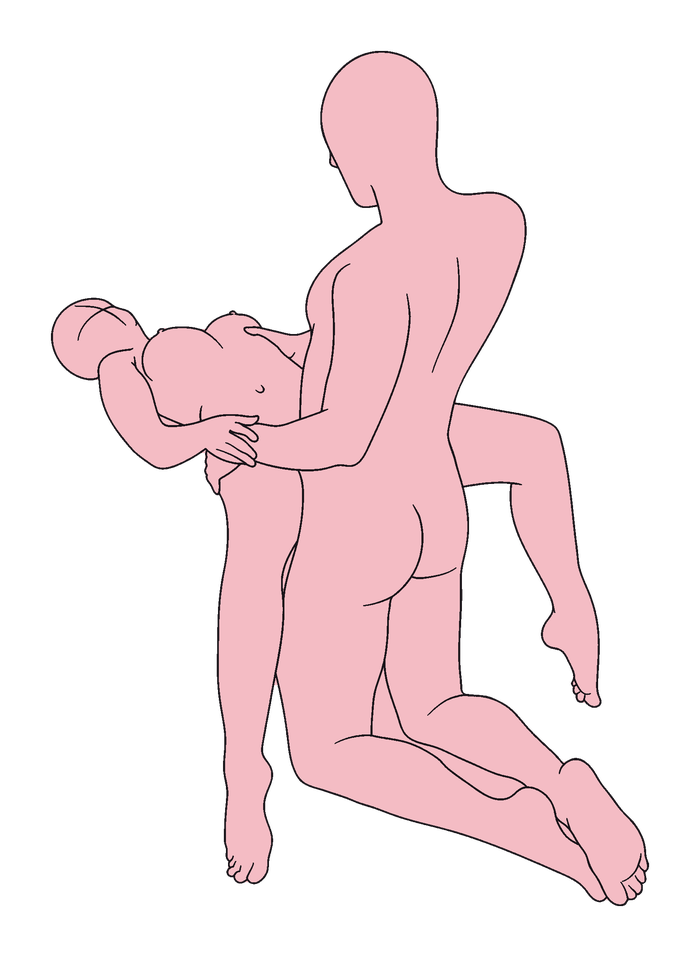
The receiving partner arches back with hips on a kneeling partner's lap, one leg hooked around their side, steadied by a firm handhold.
The G-Force
Knees pulled to the chest with the kneeling partner holding the feet — a folded position with none of the straight-leg hamstring cost, which is why it sits at the forgiving end of the middle tier. The grip on the feet gives the kneeling partner unusually direct control of angle and pace. Once the base version is comfortable, planting the feet against the kneeling partner's chest adds leverage. Full entry in the glossary.
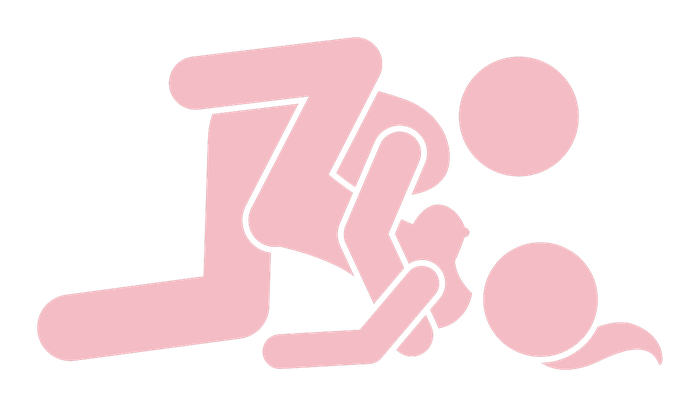
On their back with knees to chest, the kneeling partner holding their feet for control.
Mating press
A deep fold, with the legs pushed back toward the chest and the top partner leaning in over them. Its saving grace is that the depth is adjustable — the legs go back only as far as the receiving partner's hips allow, and the position works at every setting. Stop at the first hint of hip or lower-back complaint rather than chasing the full fold. Full entry in the glossary.
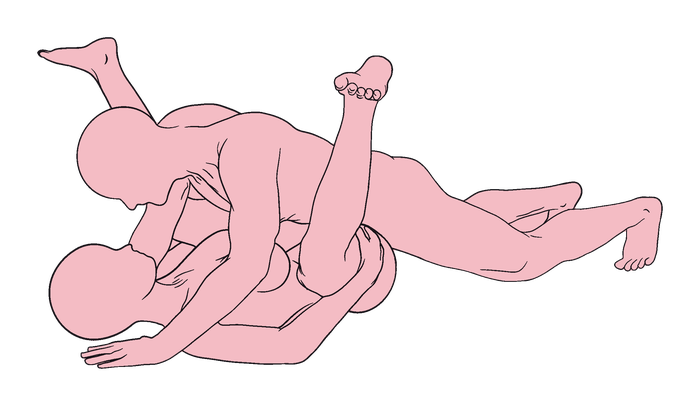
Legs drawn up toward the chest with the top partner pressed forward over them — deep and face to face.
Folded Missionary
Legs-on-shoulder with the other partner lying extended on top instead of kneeling upright, which folds the receiving partner noticeably deeper. Both legs stay straight and stacked, so the hamstring demand is real — soften the knees rather than fight it. Choose it when the kneeling version feels too far away; the cost of the closeness is the deeper fold. Full entry in the glossary.
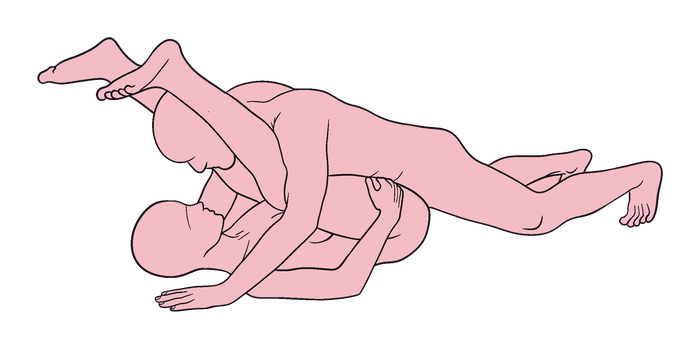
Both legs raised straight up together, ankles over one shoulder, the other partner lying extended on top.
Kneeling Splitter
One leg held vertical at the ankle by the kneeling partner, the other flat beside them — a split rather than a fold, which is a different flexibility bill than the entries around it. The vertical leg comes up gradually and stops wherever the hamstring and inner thigh say so. Works well for bodies that manage one raised leg comfortably but struggle with two. Full entry in the glossary.
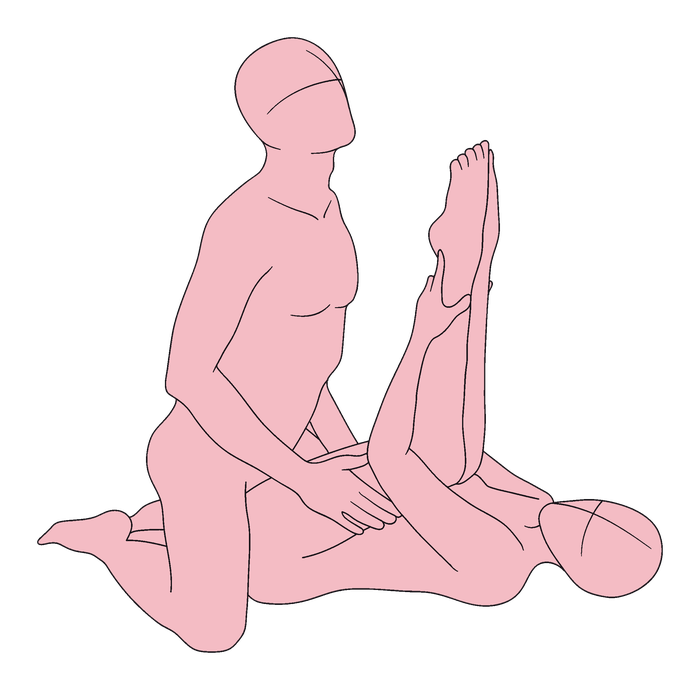
Hips on a kneeling partner's thighs, one leg held straight up at the ankle, the other bent flat beside them.
Twisted Guard
Guard with the raised legs swung off to one side, entered from a low kneeling lunge. The twist through the hips is both the working ingredient and the limiting factor — ease into the rotation instead of dropping into it. Suits couples who already like guard and want a changed angle without any extra lifting. Full entry in the glossary.
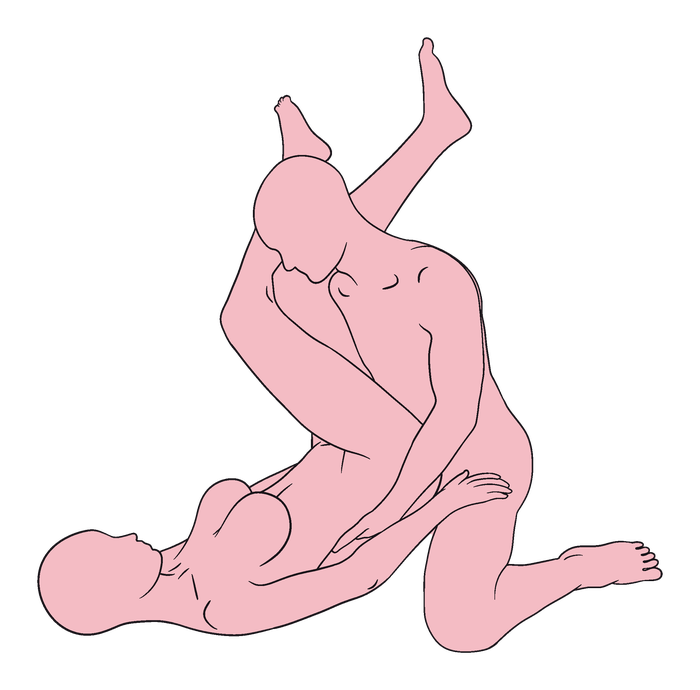
A low kneeling-lunge position with the receiving partner's raised legs twisted off to one side.
Wrapped Guard
The guard shape held with an arch: hips on the lap, an ankle locked behind the kneeling partner's waist, back bowed. Unlike plain guard, the arch takes sustained effort from the receiving partner, so treat it as a position with a running clock. Settle in gradually and step back down to guard when the back tires. Full entry in the glossary.
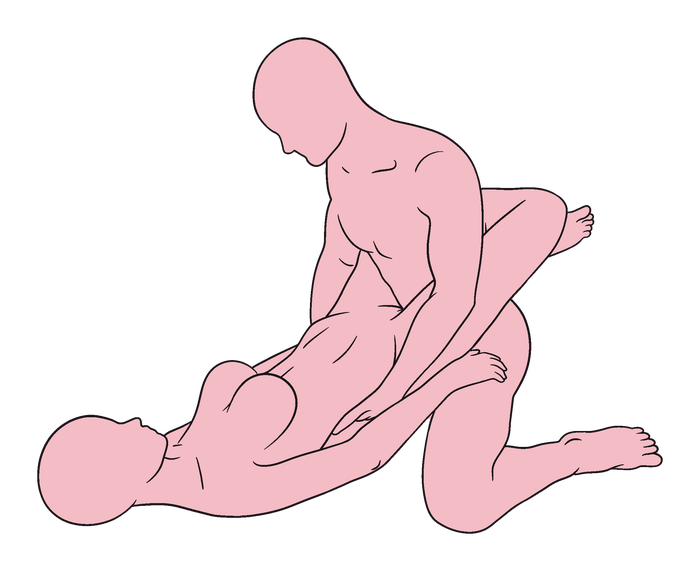
Hips lifted onto a kneeling partner's lap, legs wrapped around the waist with an ankle locked behind.
Kneeling Butterfly
Hips lifted high onto the kneeling partner's lap with the legs pointing up past their head — the tallest of the lap lifts, and the first entry that puts real weight on the receiving partner's shoulders and upper back. Let the lap carry the load and ease in rather than hoisting. If the neck registers anything at all, come down and pick something lower on this list. Full entry in the glossary.
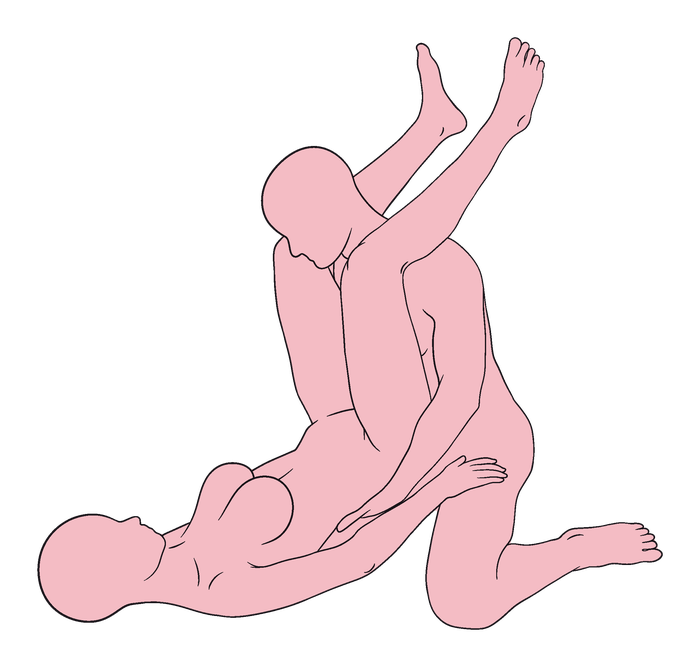
Hips lifted onto a kneeling partner's lap, legs up with ankles beside their head.
The Erotic V
The first furniture position: the receiving partner sits on a table edge, leans back on braced arms, and sends both legs up over the standing partner's shoulders. It needs a genuinely sturdy surface at roughly hip height, which is a harder requirement to meet than it sounds. The bracing makes it more forgiving than the carried position below it, but the core and hamstrings stay on duty throughout. Full entry in the glossary.
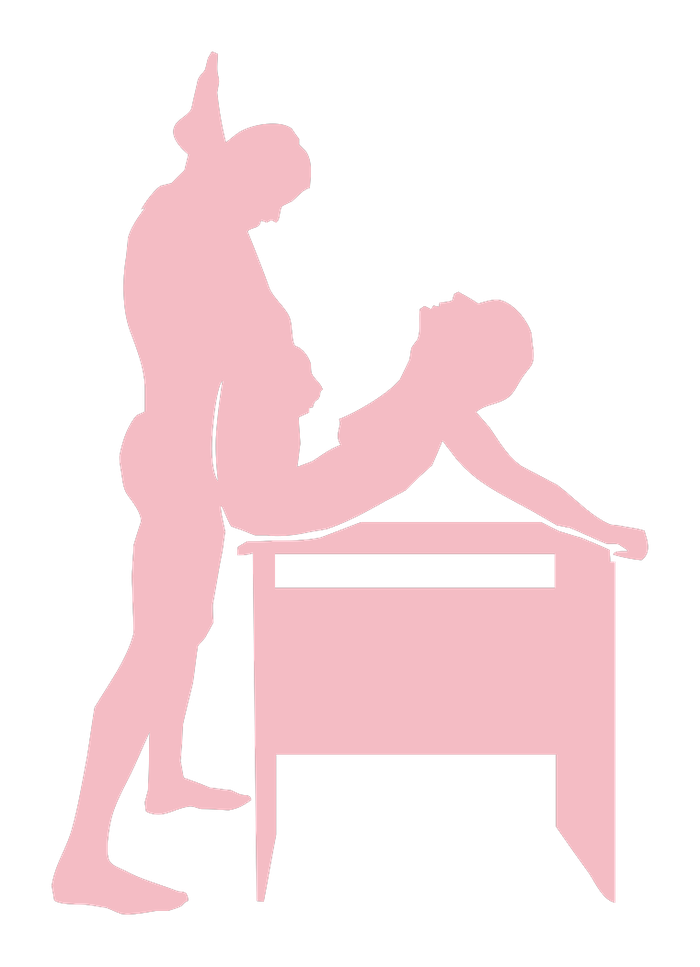
Seated on a table edge, legs braced up over the standing partner's shoulders.
The Butterfly
The step up from the Erotic V: still furniture-based, but the standing partner now supports a lifted leg and part of the receiving partner's weight rather than everything resting on the surface. That carried weight is what buys the deeper angle, and it's also what makes this a strength position rather than just a flexibility one. Get the Erotic V comfortable first. Full entry in the glossary.
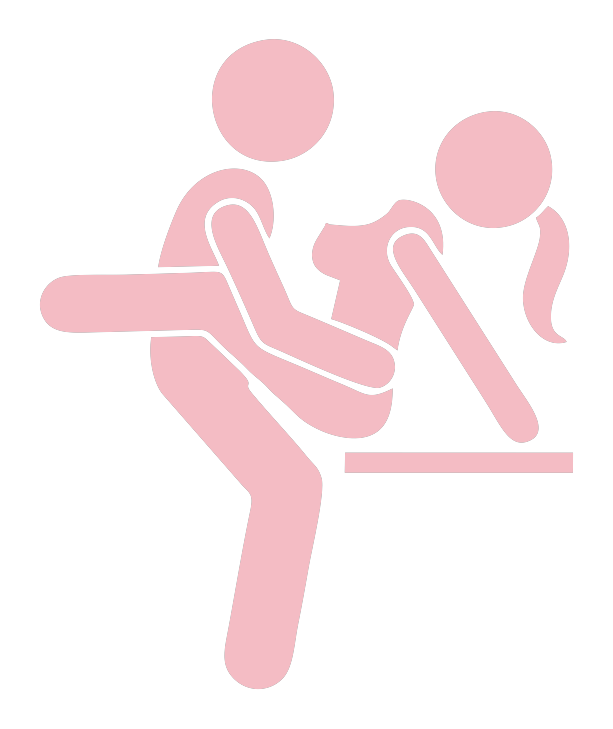
Braced on furniture with one leg lifted against the standing partner — support the leg, then find the angle.
Folded Saint
Mating press taken to its endpoint — the legs rise up the kneeling partner's front until the feet sit beside their head. The top partner rises from the press into an upright kneel, and the added difficulty lives in the receiving partner's fold. Only worth attempting once mating press at full depth feels roomy rather than maximal. Full entry in the glossary.
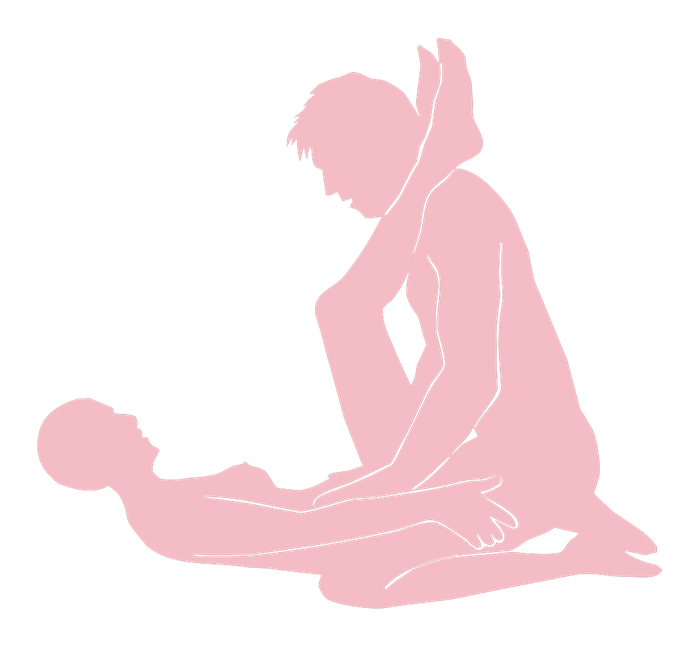
Legs raised together up the kneeling partner's front, feet beside their head — a deep, flexibility-dependent variant.
Twisted Anvil
Both legs swung together past one side of the kneeling partner's torso, with the receiving partner resting on the upper back and shoulders. Between the sideways twist and the load near the neck, this is the entry that most needs a slow setup and an agreed exit. Come out at the first sign of strain — no version of this position is worth pushing through discomfort for. Full entry in the glossary.
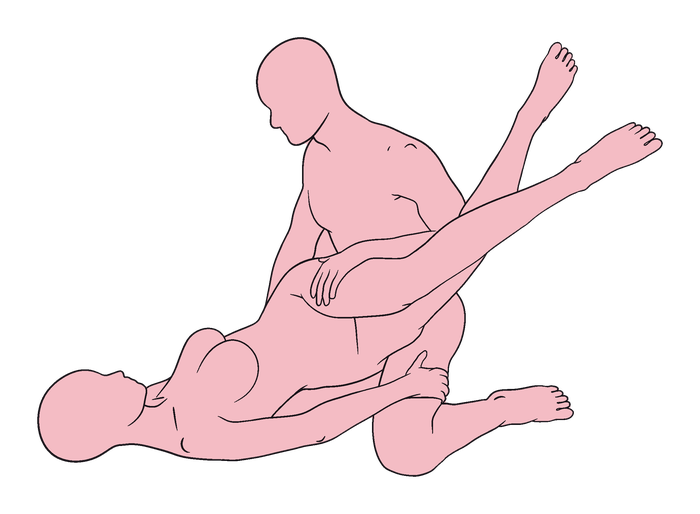
Both legs swung together past one side of the kneeling partner's torso, the shoulders taking the weight.
Saint
The receiving partner holds a full bridge — weight on hands and feet, chest lifted — while the kneeling partner supports at the hips. The bridge is the admission ticket: if it isn't already comfortable on its own, no amount of partner support makes this workable. The last stop on the list, best treated as a short, supported hold rather than a long stay. Full entry in the glossary.
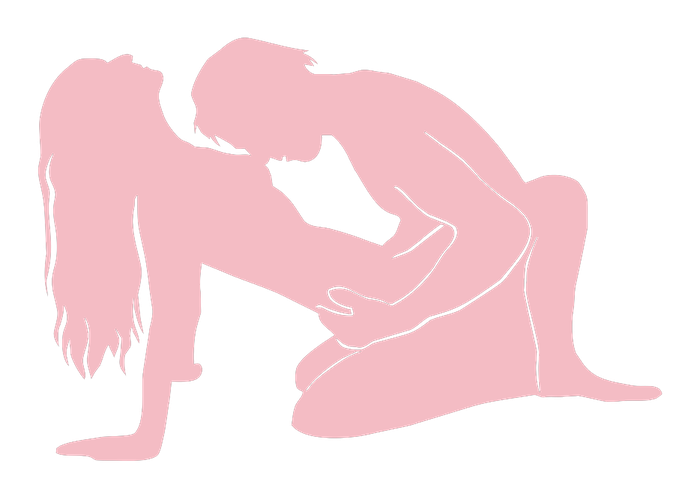
A supported backbend — the receiving partner arched up on hands and feet, held at the hips.
Before you try these
- A pillow under the hips is the cheapest upgrade — a firm pillow under the receiving partner's pelvis steepens the angle in any of the flat positions here, with nobody holding anything up.
- Legs are the master dial — before abandoning a position that feels off, move the receiving partner's legs one notch in either direction: flat, wrapped, one up, both up. Most of this family's variety is that single adjustment.
- Warm up before the folds — the deeper entries load the hamstrings, hips, and lower back, so either stretch first or work down the list in order and let the easy positions be the warm-up.
- Let the support carry the weight — in the lap positions the hips rest on the kneeling partner rather than being held aloft, and in most furniture positions the surface takes the load — The Butterfly deliberately shifts part of it to the standing partner. Outside the effortful holds, straining to hold a shape means the weight is in the wrong place.
- Use the faces — the whole advantage of this family is that you can see each other, so treat a wince or a held breath as a signal to shallow out rather than something to talk about afterward.
What makes these positions easier
Clove's guides to the props and toys that pair well with the positions on this page.
Get the free Clove starter guide
The easiest positions to try first, lube basics and our tested picks, sent to your inbox. Then one practical guide a week. No spam, unsubscribe anytime.